Sewing our Sanity

Thursday, November 22, 2012

Green Jello Salad Recipe - A Family Favorite?

Hello Ladies,


Happy Thanksgiving to you and your families!!!


Can one of you please let me know how Grandma used to make that lime Jell-O with olives carrots etc.?


Thank you!

Nettie

Dear Nettie,

When you sent that email to our mom and our aunts today requesting the green jello salad Grandma used to make, we were in the middle of gathering the ingredients to make one for our Thanksgiving dinner. Mom was delighted someone was asking for the recipe and called you immediatly. The following emails arrived this evening and provided a bit of entertainment. (As if we were not already being entertained with a houseful of kids - seven kids ages seven and under.)

Aunt Kathleen oughta know. Her kids are quite crazy about it, and I think she worked many years perfecting it. I believe that's all they have at Thanksgiving. She sometimes stuffs the turkey with it.

Aunt Elaine

Elaine, you are impossible! Monica asked if she should make it this year and I said no, no one likes it. But she said we had to have it and some of them actually finally like it. But the best thing is that it's going into the new generation. Liam asked on the way here if Grandma was going to have the green jello salad. He said, " I told my teacher about it. I said it has carrots and green olives and pecans. " He did ask not to put celery in it.

Margie

Nettie, I like it enough to eat it all by myself, so have never worried about whether anyone else liked it. It's best with black, not English walnuts.


I don't know whether my mom or grandma made it first, but we never had a Thanksgiving or Christmas dinner without it. I think the thing my kids found most disgusting (yes, that's the right word; Philip once took it outside to throw at his cousins) about it was that some of us even put a dollop of mayonnaise on top.

Enjoy!


Love,

Aunt K


Ha Ha! Margie called me so I am good to go.


Sorry Aunt Kathy! I just figured you would know, no idea it was the bane of your Thanksgiving dinner. I told Margie, either you liked it as a child or you didn’t. I have always liked it but haven’t had it in so long and thought it would be a nice addition to the table tomorrow.

I know you will all have wonderfully made dinners either by you or your well instructed off-spring. Enjoy and I love you all!Nettie

So, now that the table and jello are both set, we have a minute to send you the recipe.


Mix jello with 2 cups of hot water and be sure to disolve all of the gelatin. Add 1 cup of cold water. Place in fridge until it starts to set, about 10 minutes, maybe more, stirring occasionally.


Add the rest of the ingredients. 4 cups of whatever. Green olives, apples, carrots, pecans or black walnuts, celery, grapes. You do not have to add everything and if you can think of other things that might taste good, knock yourself out.


Pour into a jello mold, or in our case a bundt pan, refridgerate until set and ready to eat.
When ready to serve, invert the salad on a serving plate and add a dollop of mayonaise to the middle of the mold. We filled the hole in the salad up with mayo. Too bad Aunt Kathy isn't here.


Happy Thanksgiving!
Monica and Emily


Monday, November 19, 2012

Quilted Jacket and Jumper

Dear Emily,

Two more days and we will all be home! "Home" being Mom and Dad's. I love the saying "Home is where your mother is." So true.

I am bringing a bunch of clothes for Natalie and Mikey, including this dress and jacket.
  
  
It is so hard to part with but it really does not fit Caroline anymore. She wore it yesterday for the last time. Sniff, sniff. I had such a good time making it and she looks so cute in it. Natalie will look just as cute I am sure!


I used this pattern by The Scientific Seamstress for the jumper. It is a great multi-size pattern and I have used it a number of times.


The jacket was the Natty Jacket from Pink Fig Designs

It is a quilted jacket, with the arms and body quilted before sewing it together and before the lining is added. I added the bird applique on the back to match the bird applique on her jumper. 


I made Caroline another one when she was two or three that we passed on to Natalie already I think.

She had just had a donut after church and was a little less than cooperative in letting me take her picture.


There was a leaf pile in the middle of the yard that she was just dying to jump in.

 And she is gone...
  
One last decently posed picture...

It is just too enticing...

And we are done taking pictures...

XOXO
Monica


Thursday, November 15, 2012

ID Bracelets

Dear Emily,

One of my biggest fears is loosing my children in a public place and I can imagine it is one of yours, too. I have seen the temporary tattoos that have a name and contact information that can be made for a big trip, such as to Disney World. Actually they would be great for any outing - the park, the mall, Wegmans. I have thought about making some. There is even tattoo paper for the Silhouette. 

This summer we took a trip to the zoo with a friend and her four kids. That is seven kids from ages 2 - 10. On a typical busy summer day at the National Zoo in DC. Crowded. We lost Anthony once. He had just wandered ahead but I panicked. My friend and I were talking about what to do if anyone was lost - would the child know what to do. We have been working on memorizing our home phone number. There are just too many numbers to learn these days! Home, mom's cell, dad's cell. She and I talked about the tattoo IDs but I am sure I would forget them. My friend had a brilliant idea...bracelets with a cell number on them! 


 I got some stretchy cord,
  

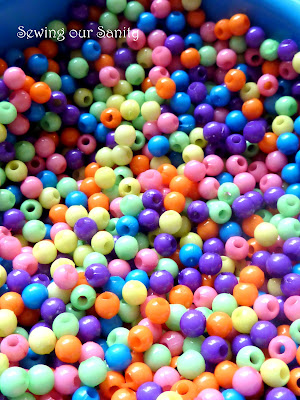
 colored beads,


and number beads. 
(I found these at Hobby Lobby, Michaels didn't have them. 
Love Hobby Lobby. It is like Michaels on steroids.)


I made a bracelet for each of the kids. I have enough number beads left over to make one for each with Paul's cell number.


Sorting and stringing beads was a nice activity to do with Caroline while Gabe was napping. And these trays from Kids Cuisine microwave meals are perfect for sorting. They make great paint trays, too.


xoxo
Monica

Monday, November 12, 2012

Burlap Table Runner

Dear Emily,

Burlap is all over the place in home decorating lately, have you noticed? I decided to make a burlap table runner. 


I used the cream burlap rather than the natural and a narrow ivory cotton lace. When I was shopping for the lace in Hobby Lobby, I found this:

Hobby Lobby
I knew immediately how I wanted to use it in the runner.


I cut two 6" x 52" pieces from the burlap. 


Usually I use a rotary cutter but because the burlap has such an open weave, I wanted to be sure my cut lines where perfectly straight along the grain. 

I stitched them together length-wise with the flowered ribbon between creating a lace insert.
 I sewed the ribbon and burlap right sides together (yeah, I do realize the burlap has no "right" side, but the ribbon did and I didn't want the raw edges showing). I used a straight stitch, carefully pressed the seams towards the ribbon. I tried to press the seams towards the burlap but that made the seam too bulky. 

I stitched over the raw edge with a zig-zag stitch. The burlap unravels easily so I wanted to be certain it was stitched securely. 

I used an ivory thread in my sewing machine so the stitching can't be seen, even on the front. Before sewing the cotton lace on the edge, I curved the corners of the runner using a dinner plate as a pattern for the curve. 


To stitch the lace trim on the edge, I sewed it on top of the right side edge with a straight stitch and went around again with a zig-zag to make sure burlap would not unravel.

I love how it turned out but have not a single place to use it in my house! It would look best on a dark table and mine is not. I took it to a friend's house to take these pictures. She has a fantastic kitchen table. Extra long with chairs and a bench. I am bringing it to our parents' for Thanksgiving. The runner, not my friend's table. Any ideas on how to decorate the table for Thanksgiving dinner? I was thinking of making these for place cards.

xoxo
Monica

Friday, November 9, 2012

Fairy Garden and Little Doll

Dear Emily, 

Caroline had this out today:


The cute little fairy garden play mat and doll you made her for Christmas last year. 

She plays with it often. And adds other things. Little plastic animals, especially her ponies are perfect for the garden.


 I would have loved one of these when I was her age. 

I had to send you all these pictures today and tell you she has named the doll "Dorphan." 


No idea where that name came from except it is a variation of the word "orphan." I wonder if she thinks Dorphan is lonely? Maybe she needs a playmate just her size. Did you use a pattern for her?

Have you seen this
source

I have a box I've saved to make one for Caroline. I'll put that on my list of things to do. That list that isn't written down anywhere because it is too long.

 xoxo
Monica


Monday, November 5, 2012

Irish Lassie Pleated Skirt

Dear Monica,

I had a nice piece of tweed in my stash that was just the right size to make a skirt for Natalie.  And to me tweed just begs to be pleated, so I made a cute little pleated skirt for Natalie.  I made it up as I went along and I love how it turned out.


This morning at church a very nice lady told her that she loved her cable sweater and tweed skirt and asked where she got them.  She said her parents are Irish and still live in Ireland and that Natalie looked very traditional.  Sam didn't know I had made the skirt.


It was a very easy skirt to make.  I cut 2 rectangles that were about 8 inches wider than Natalie's waist measurement (20 in) and as long as I could with the fabric I had.  So they were 28"X 14".  Then I cut 2  smaller waistband rectangles that were 28" X 4.5".  


Then I pleated the front of the skirt.  With a chalk pencil I marked every inch and starting at one side I matched up every other pleat and pinned them in place.  I also made sure to match up the plaid pattern of the tweed.  Then I top stitched the edge of each pleat.   

I added some interfacing to one of the waistband pieces and attached it to the pleated front panel.  And sewed the other front panel (with no interfacing) to the back panel. Then I sewed the front and back panels together.  

I serged the top edge of the waistband (or you could press it over 1/4") and then folded the waistband in half and pressed.  I only sewed the back waist band down to make a casing and threaded it with elastic and stitched the elastic in place.  


Then I folded the front waist band over, pinned it in place, and top stitched it at the bottom and top of the waist band piece.  I made an extra wide hem so that it can be let down next fall (or even this fall since she is growing like a weed).


The skirt looks especially cute with the hand-me-down sweater of Caroline's!


I can't believe she is going to be 3 in two weeks!!  Where has that time gone?!?  *sniff sniff*

XOXO
Emily


Friday, November 2, 2012

Witches Brew Recipe

Dear Emily,

I promised you the witches brew recipe but first a little witch


and a ghost


and a ninja.


The witch's vest is made from a McCalls pattern, #5732.


 I made the petals pointed instead of round - more witchy. (plus easier to cut out) I made the tiered skirt our of organza following the directions in the September/October 2012 issue of Sew Beautiful. And I learned how to gather on the serger!

The ghost is just a mosquito netting circle with a hole and a hood.

The ninja was a karate guy for school and at the last minute I asked if he wanted a mask to be a ninja. I figured I could cut something out of a white knit, which I just happened to have, that would work. Instead of trying to invent the wheel, I googled "ninja hood" and found a bunch of DIYs that used a t-shirt and no cutting OR sewing. I used this one from the blog The Train to Crazy. I am certain this will be the most used costume accessory. It would be cool in black, red, or just about any color.

Now, the Witches Brew recipe. I made it with both Caroline's pre k class and Anthony's second grade class. I remember our mom making it for my class when I was in 2nd or 3rd grade. I told the classes the recipe was really old, over 35 years old. There are 14 ingredients and 14 children in Caroline's class so there was one for each. Anthony's class has 32 so I split the ingredients up so everyone had something to contribute. I was so careful counting everything but still was short one. Anthony was a good sport and read the recipe to the class instead of adding an ingredient. 

Strawberry juice- red water
Moondust - lemon koolade
Powdered bat tongue- orange koolade
Ground jack-o-lantern-orange sugar
Bluebird juice-blue water
Dragon fingernails-lemon rind
Dragon teeth-lemon seeds
Pumpkin juice-orange water
Ground robin egg shells-blue sugar
Firefly juice-lemon juice
Rattley bones-ice cubes
Powdered lizzard livers-strawberry koolade
Swamp water-green water
Dandelion juice-yellow water

Each child had one ingredient and as we read down the list, they tried to guess if they had the correct ingredient. It is just three packages of koolade, three cups of sugar, and six quarts of water. For the colored sugar, I put a cup and a half in one zip lock bag and the other cup and a half in a second zip lock bag. I added a few drops of liquid food coloring and mixed it up until the color was even. It tasted like a gummy bear and looked like dirty paint water. The kids loved it!

xoxo
Monica